• Skip to secondary menu
  • Skip to main content
  • Skip to primary sidebar
  • Clearance Rack
  • Product Suites
  • Bundled Savings

Teresa Buchholz, Stampin' Up! Demonstrator

I fell in love with stamping with my first card and became a Stampin' Up Independent Demonstrator in February 2009. Creating fresh project ideas, cards, scrapbook pages and gifts is more that just stamps and ink, it is about sharing part of yourself with crafters you love.

  • Home
  • Events
  • Current Catalog(s)
  • Specials
  • Shop Now!
  • Join My Team
    • Sign Up Online!
  • Contact

Happy Owl Punchy Monday!

February 25, 2013 1 Comment

I am sure Monday is probably not one of your favorite days of the week. My favorite days of the week are Friday to Sunday because I get to spend time with my stamping buddies! It is nice that Mondays are gone quickly and we can ‘owl’ get it over with as soon as possible! So I would like to share my punch art Momma owl and her baby with you!

20130224-230031.jpg
I was putting away my Owl Occasions stamp set in the maybe(it will make it to the new catalog) drawer, when I thought, maybe if I used it one more time and it was just too cute that SU would put it in the new catalog in June! There are so many owl lovers out there that even if it doesn’t make it, I will be proud that I gave it my best try!
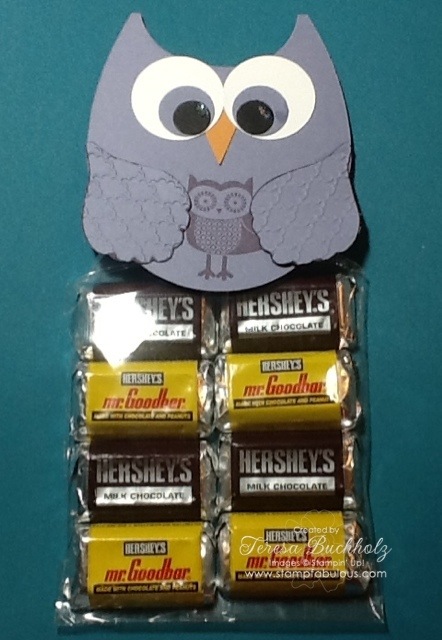
To make this Mommy and Me goodie bag topper I used:
Wisteria Wonder, Whisper White and Black card stock
BigShot, Oval Framelits, Fancy Fan Folder Embossing Folder
Oval or Circle punches to make the the cut in between the ears (you can use either to get the same effect)
Blossom Builders Punch to make the wings and the Fancy Fan Fold Embossing Folder to make them fabulous! I also used my sponge to edge them with Perfect Plum to make them pop up more and to stamp the baby owl.
If you are wondering how I made this topper as one piece, here are the details:
I used the next to largest Oval Framelits to cut the base, you have to move folded card stock down about a half inch, so the the edge does not get cut, then you take a punch and make a circle or oval depending on which one you have that will fit and cut thru the fold to make the ears.
I hope every one has a fabulous week!

Pin
Share
Tweet
Share
0 Shares

Filed Under: Uncategorized

Reader Interactions

Comments

  1. Lisa Young says

    March 4, 2013 at 6:42 pm

    This is soooo cute and creative!!

    Reply

Leave a Reply Cancel reply

Your email address will not be published. Required fields are marked *

Primary Sidebar

  • Facebook
  • Instagram
  • Pinterest
  • Twitter
Teresa Buchholz

Teresa Buchholz

Stampin' Up! Demonstrator
Contact Me!


Click to download the Annual Catalog.

AMERICAN Stampin' Up! Annual Catalog

Archives

Categories

Shop My Online Store
Disclaimer

All images © Stampin' Up! 1995-2021; unless otherwise noted, all content on this blog including but not limited to text, photos, designs and artistic concepts are © Teresa Buchholz. All rights to submit any of projects for contests are for only. The content of this blog is my sole responsibility as an independent Stampin' Up! demonstrator and the use of, and content of, the classes, services, or products offered on this blog is not endorsed by Stampin' Up!

Content © Teresa Buchholz, all rights reserved. Wordpress Genesis Framework customized by WebsByAmy, LLC